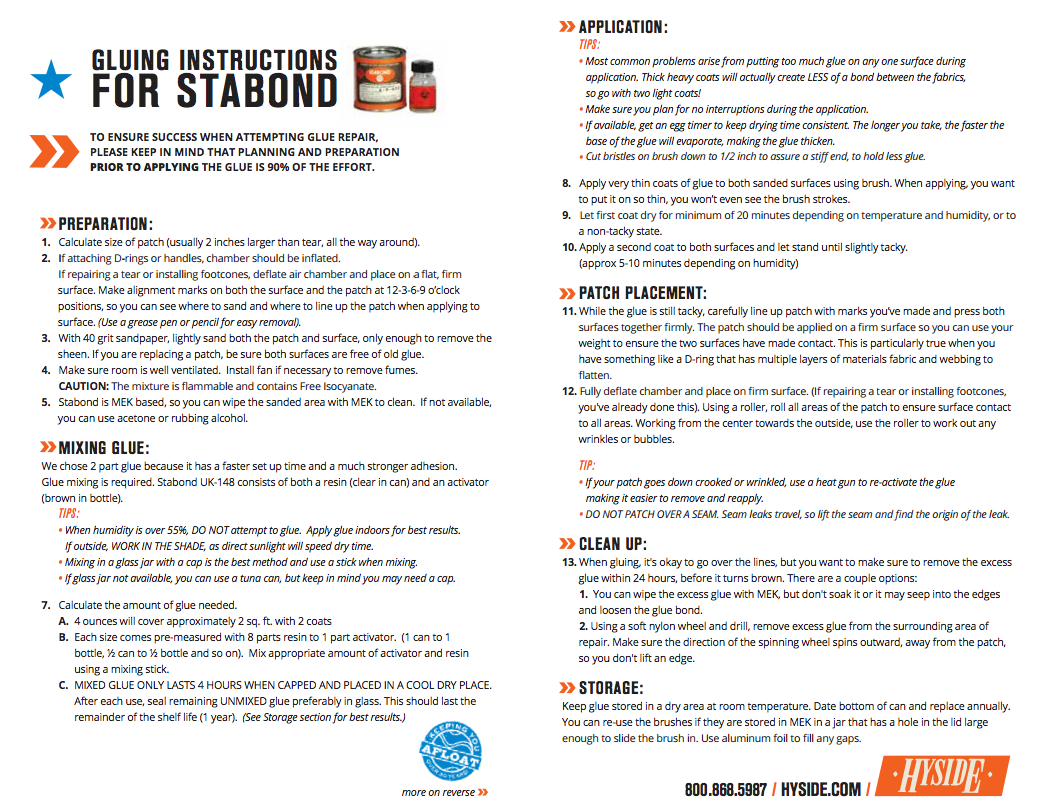
To PRINT instructions click here.
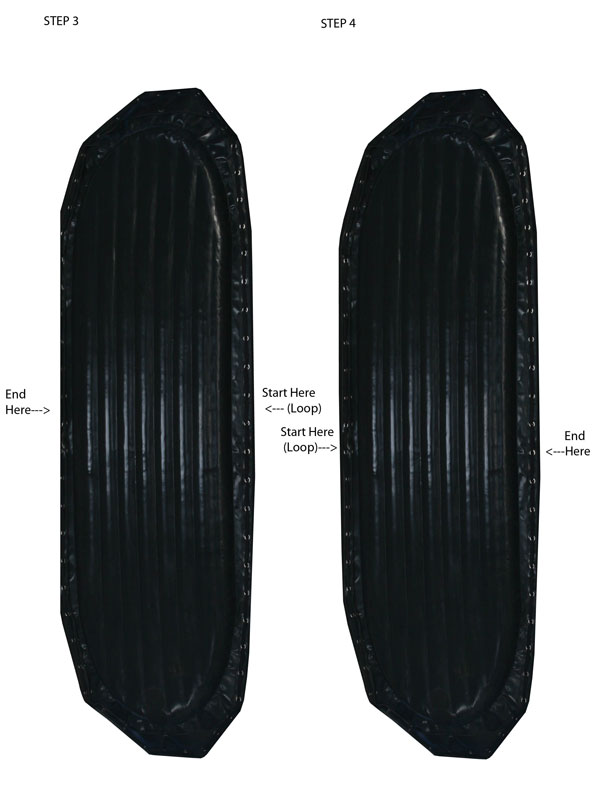
After the above steps have been completed you’ll be able to complete a final tightening of the webbing. Place a knot in the end. This knot should be one that you are able to untie at a later time for readjustments. With the remaining loose ends (1ft. is sufficient) use half hitches to prevent it from hanging loose.

Here are some links to clinics, schools and certification courses for rafting and kayaking:
| Clinic | State | Raft | Kayak | Day | Multi-Day | Guide | Rescue |
| www.sundanceriver.com | Oregon | X | X | X | X | ||
| www.highcountryexpeditions.com | California | X | X | X | X | ||
| www.montanariverguides.com | Montana | X | X | X | X | X | X |
| www.sanjuanrivers.com | Washington | X | X | X | |||
| www.malode.com | California | X | X | X | |||
| www.wavetrek.com | Washington | X | X | X | X | X | X |
| www.cotr.bc.ca | British Columbia | X | X | X | X | ||
| www.ncrivers.com | Maine | X | X | X | X | ||
| www.insideoutexperience.com | Alberta | X | X | X | X | ||
| www.hyak.com | British Columbia | X | X | X | |||
| www.reorafting.com | Oregon | X | X | X | |||
| www.suskwa.bc.ca | British Columbia | X | X | X | |||
| www.noc.com | North Carolina | X | X | X | X | X |
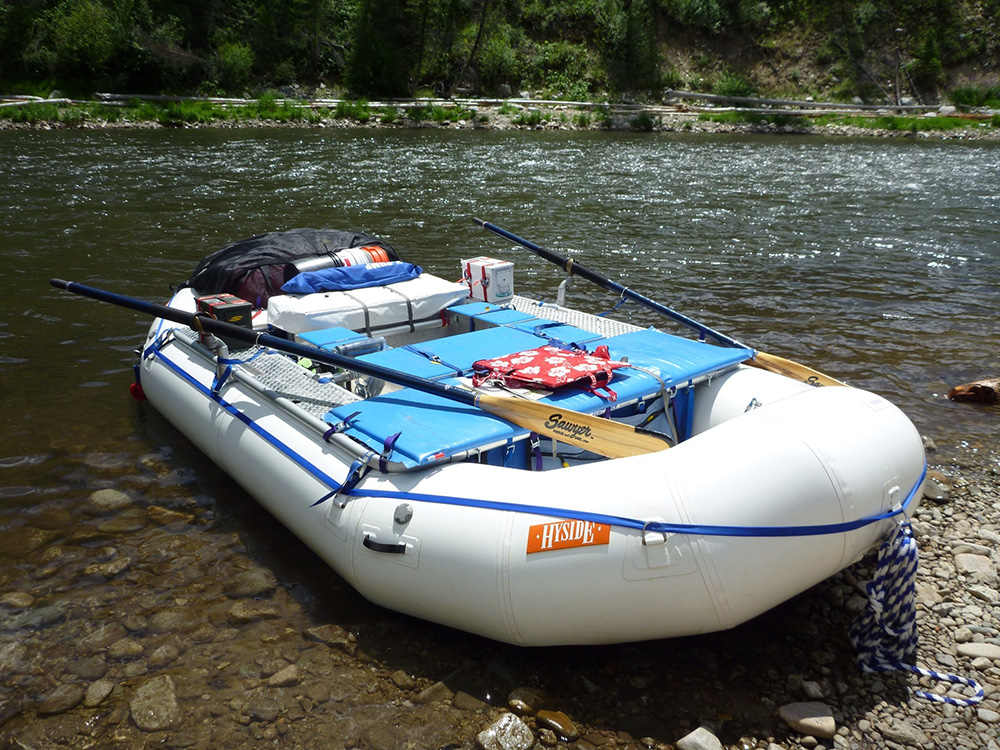
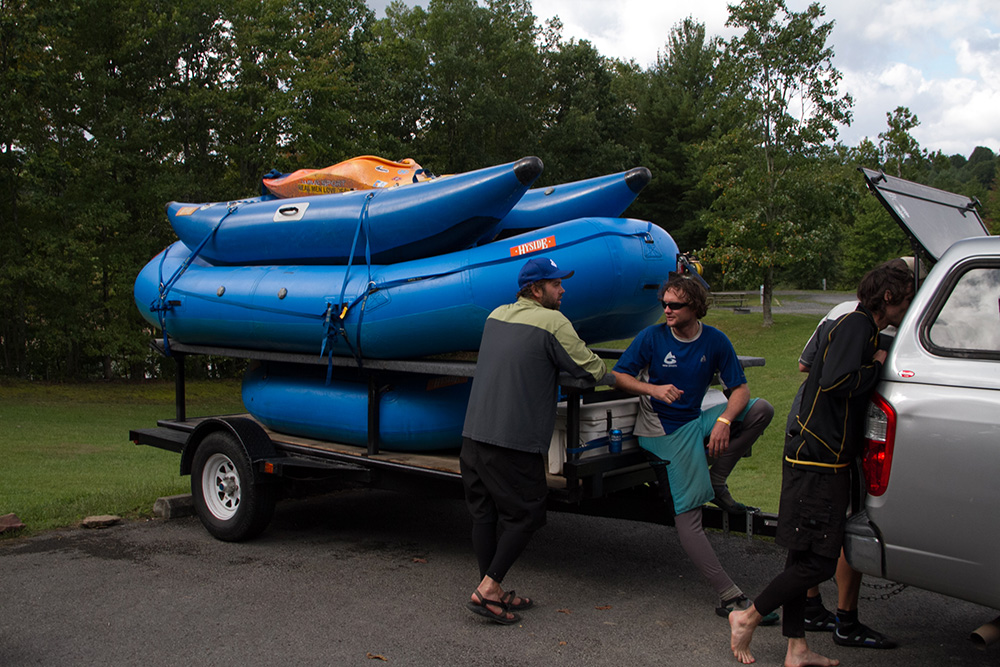
A raft with a frame will be your choice if you take out large parties on either day trips or weeklong expeditions and need to haul lots of gear. Just remember that rafts with frames are much more difficult to transport and setup than inflatable rafts w/o frames. Because of this, if you plan on using the raft a lot, you might consider getting a trailer for it to avoid the time and hassles of constantly having to set up and take down the raft.
Inflatable rafts with frames will also be your choice of vessel if you plan on running Class IV+ whitewater if you have a crew with limited experience (paddling). The toughness and durability of these rafts will allow the raft to survive the mean encounters with obstructions that occur in whitewater rafting.
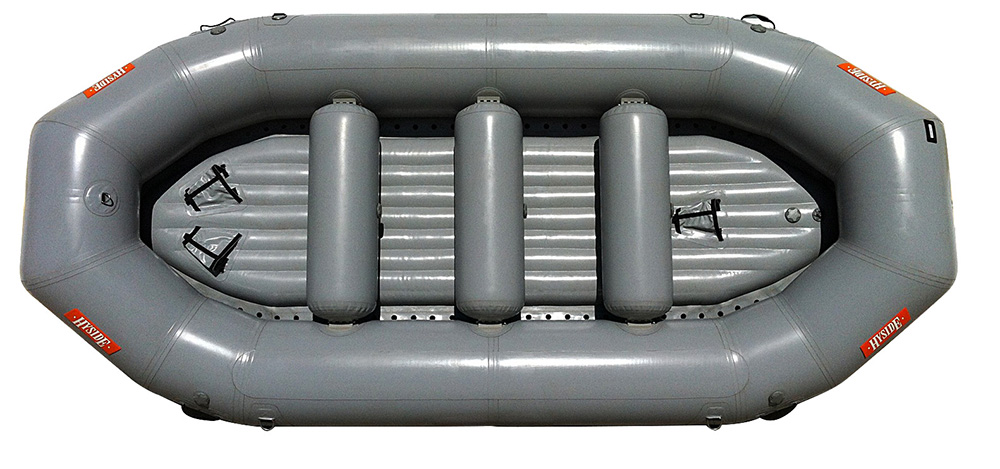
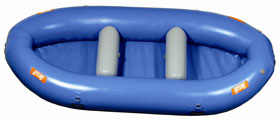
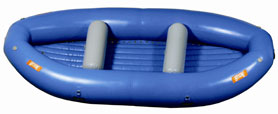
Inflatable rafts are ideal for both solo anglers and float parties up to 8 people (depending on the raft’s size). These inflatable rafts handle whitewater up to Class IV or V (depending on the skill level of your crew) and provide plenty of room and comfort for day trips. For solo paddlers, these inflatable rafts (just remember to get a good one!) also work extremely well for multi-day floats. Non-rigged inflatable rafts also provide for very easy setup and are immensely portable.
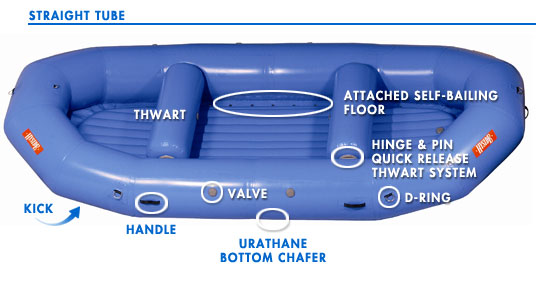
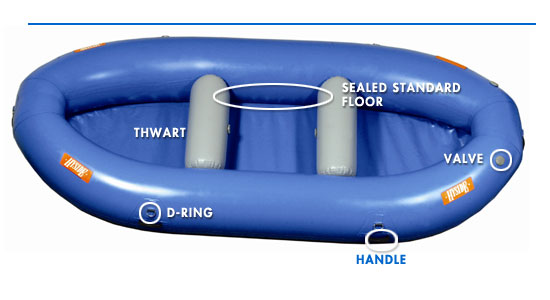
The main difference between a standard and self bailing floor is that standard (non self-bailing) floors are sealed to the outer tubes, whereas the self-bailing floor is inflated and is either laced in or glued with holes allowing the water to exit. The floor of a self bailing raft is a wide flat inflated chamber. When inflated, the floor is about 4 or 5 inches thick, so the top surface of the floor is above the surface of the water. When water splashes into the raft, it flows across the floor, down over the edge of the floor, and out through the lacing.
A ‘standard’ (non self-bailing, or ‘bucket’ boat) floor is sealed to the outer tubes, so that any water that enters, stays.
A self-bailing floor is exactly what it says: self-bailing – the floor has holes allowing the water to exit. How and why? The floor of a self-bailing raft is a wide, flat inflated chamber. When inflated, the floor is about 4 or 5 inches thick, so the top surface of the floor is above the surface of the water. When water splashes into the raft, it flows across the floor, down over the edge of the floor, and out through the holes.
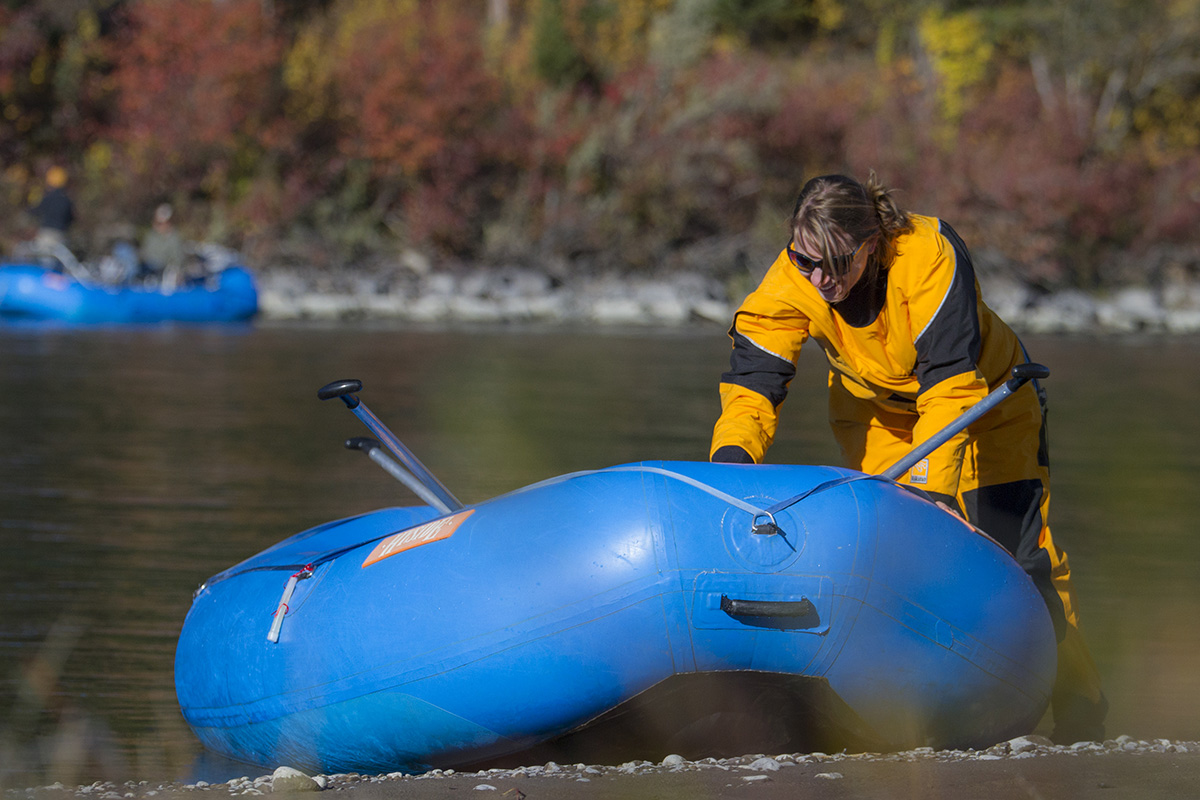
It is important to mention how important it is to avoid the cheap inflatable rafts that are commonly found in department stores these days. While these cheap inflatable rafts work fine for the local beach or small pond, if you plan on doing a long river float in these boats – especially through remote terrain or where rapids will be encountered – avoid these rafts like the plague. The lack of durability of these cheap rafts are legendary. Using these cheap inflatable rafts is a wonderful way to end up having a long walk back to the car due to the raft falling apart. The reason these inflatable rafts lack durability is that their fabric is of the cheapest variety found and quickly breaks down under UV rays, mildew, chemicals and just plain old use. Even worse, the seams of the raft (the seams are what connect the various compartments) are poorly made. As such, the seams quickly begin to either come unglued or develop holes in their own right. And once a hole or rip develops in a seam, the raft becomes useless, as repairing holes in seams is extremely difficult and rarely lasts.
Before diving into more detail about inflatable rafts, here’s a quick run-down on the benefits of using inflatable rafts for fly fishing:
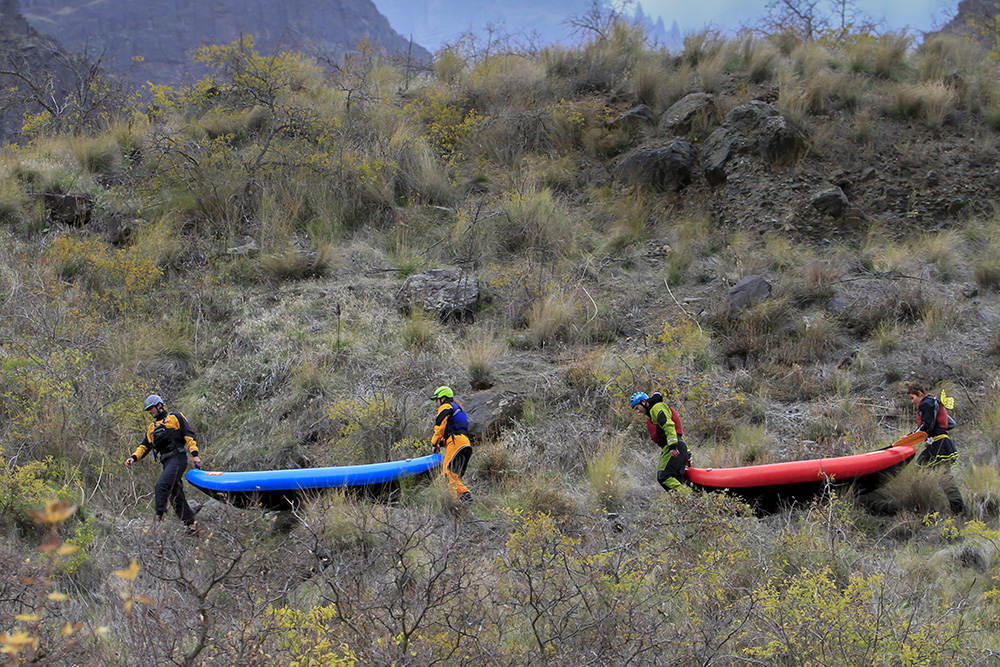
An inflatable kayak deflates and rolls up into its own carrying case. The inflatable kayak in its carrying case will weigh from 20-45 lbs (depending on the type of kayak), and can easily be lugged around and fit in any trunk. The lighter kayaks can even be backpacked in to remote locations. Inflatable kayaks are probably, second only to float tubes, the most portable fly fishing boat a person can buy.
Inflatable kayaks are incredibly simple to set up. Just take them out of the bag, lay them out flat, and inflate them to the proper pressure. Inflation can be done either with an electric pump or by using a standard bellows pump. Either method works just as well as the other to inflate the kayaks, although the electric pump does save a couple of minutes. All in all, most inflatable kayaks can be fully inflated and ready to go in about 10 minutes using a foot pump, 5-7 minutes using an electric pump.
Inflatable kayaks designed for heavy-duty river running (Class IV+) are extremely durable. An inflatable kayak rated for Class IV whitewater will withstand even the meanest encounters with rocks, logs and other obstructions year after year. Inflatable kayaks rated for Class III and under whitewater are almost as durable, because the softer fabric literally bounces the kayak off obstructions. And, should you happen to develop a puncture or tear in the kayak, it is easily fixed. Use either the supplied repair kit – which sets up quickly and allows the kayak to be back on the water in less than 30 minutes ? or a piece of duct tape for short term and emergency repairs.
Inflatable kayaks are extremely simple to use, even for beginning paddlers. Paddling and maneuvering of inflatable kayaks is so simple, in fact, that beginner paddlers will quickly figure out all the basics. This is much different than a traditional hard shell kayak, which requires some skill in paddling.
Inflatable kayaks are very safe boats. Unlike canoes and traditional hard-shell kayaks, inflatable kayaks are very difficult to tip over. While you can do it, you really have to work at it. The flat bottom makes them super stable.
For inflatable boats, inflatable kayaks have an excellent capacity. Whether you want to use it for day trips or multi-day floats, these kayaks can take all the gear you can throw in them.
There are many uses for inflatable kayaks for anglers, whitewater and floating enthusiasts.
Inflatable Kayaks are generally in the order of 10-12 feet long. This allows an angler to sit comfortably in the seat and to fly cast with accuracy. Some of these kayaks also now come with special seats that increase the height at which the angler sits, making casting even easier. Two anglers, provided they are careful with how they cast, can also fly fish from the boats at the same time.
Quality inflatable kayaks are rated to handle either Class III or Class IV whitewater, depending on how the kayak was constructed. An inflatable kayak constructed from various fabrics will be fully capable of handling Class IV whitewater while a more traditional vinyl and PVC kayak (which are less expensive) will be able to run Class III whitewater.
Inflatable kayaks have a surprisingly large capacity, exceeding that of hard shell kayaks. Capacity generally ranges from 400-600 lbs., allowing all sorts of camping gear to be taken on longer river journeys. A solo paddler in a quality inflatable kayak can easily take 300 lbs of gear, allowing for river trips of 1-2 weeks.
Inflatable kayaks are incredibly easy to paddle on lakes. The lightweight, V hull and low profile all make paddling on lakes, even in windy conditions, simple. And the paddling method to propel an inflatable kayak is extremely simple – even beginners can pick up the motions in just ten minutes or so. Many good kayaks also have the option of adding a directional skeg to them. This skeg allows the kayak to track almost perfectly straight, even when paddled by a single person. In comparison to traditional canoes, inflatable kayaks are much simpler to paddle for a single person.
Inflatable kayaks are probably, second only to float tubes, the most portable fly fishing boat a person can buy. Inflatable kayaks deflate and roll up into their own carrying case. This carrying case, which will weigh anywhere from 20-45 lbs (depending on the type of kayak you have), can easily be lugged around and fit in the back of any trunk. The lighter kayaks can even be backpacked in to remote locations.
Inflatable kayaks are incredibly simple to set up. Just take them out of the bag, lay them out flat, and inflate them to the proper pressure. Inflation can be done either with an electric pump or by using a standard bellows pump. Either method works just as well as the other to inflate the kayaks, although the electric pump does save a couple of minutes. All in all, most inflatable kayaks can be fully inflated and ready to go in about 10 minutes using a foot pump, 5-7 minutes using an electric pump.
Inflatable kayaks, as they are designed for heavy duty river running, are extremely durable. An inflatable kayak rated for Class IV whitewater will withstand even the meanest encounters with rocks, logs and other obstructions. Inflatable kayaks rated for Class III whitewater are almost nearly as durable, as the softer fabric literally bounces the kayak off of obstructions. And, should you happen to develop a puncture or tear in the kayak, it is easily fixed. Use either the supplied repair kit – which sets up quickly and allows the kayak to be back on the water in less than 30 minutes. A piece of duct tape even works for short term and emergency repairs.
Inflatable kayaks are extremely simple to use, even for beginner paddlers. Paddling and maneuver of inflatable kayaks is so simple, in fact, that beginner paddlers will quickly figure out all the basics. This is much different than a traditional hard shell kayak, which requires some skill in paddling.
Inflatable kayaks are very safe boats. Unlike canoes and traditional hard shell kayaks, inflatable kayaks are very difficult to tip over. While you can do it, you really have to work at it. The reason for this is because inflatable kayaks have a flat bottom, making them very stable.
For inflatable boats, inflatable kayaks have an excellent capacity. Whether you want to use it for day trips or multi-day floats, these kayaks can take all the gear you can throw at them.
Hypalon is a synthetic rubber material patented by DuPont and is mainly used an exterior coating for inflatable boats. Hypalon can defy extreme temperature, corrosion, UV degradation, gasoline, chemicals and environmental contingencies and is considered the most reliable and durable inflatable boat fabric available. Hyside’s 80/20 Hypalon coating typically will last for more than a decade even in the roughest environments.
PVC is a vinyl polymer chemically known as polyvinyl chloride. It has several applications in the leisure and construction industries: making inflatable pool toys, mattresses and beach balls. Because it is a type of plastic, it can be thermo bonded or glued. This allows the manufacturer to mass produce the boats on a large scale with machines and unskilled labor. But repairs can be difficult on PVC boats because thermo welding is not feasible outside of the factory and it is very hard to repair even a pinhole leak in a seam.
| HYPALON | PVC | |
| Highly resistant to environmental caustics (gas, chemicals, etc.) | YES | |
| Recommended for use in severe climates | YES | |
| Recommended for leaving boats inflated or for frequent use | YES | |
| Best properties for resisting abrasion | YES | |
| Fabric of choice for U.S. Military and Coast Guard | YES | |
| Easiest to repair leaks, etc. | YES | |
| Seam construction | Overlapped or butted, then glued* | Glued or fused together using welding** |
| Manufacturing process | Handcrafted | Mass produced |
| Weight (13 foot self bailing boat) | 75 to 115 lbs. | 115 to 130 lbs. |
| Colors available | 5-7 | 15+ |
| Expected life expectancy under normal river rafting use | 10-15 years | 2-3 years |
| Average cost (13 foot self bailing boat) MSRP | $4400 | $2000 |
*Hypalon boats are either overlapped or butted, and then glued. Butted seams produce an aesthetic, flat, airtight seam, without the ridge or air gaps left by some overlapped seams. In stress tests, Hypalon and neoprene glued seams are so strong and reliable that the fabric will fail before the seams.
**The seams of PVC-coated inflatables can be fused together using several different welding techniques. Despite many technological advancements, the heat used to weld the seams is not always distributed evenly across the seams—which creates pockets where air may escape—and welded seams tend to become brittle over time.
Fabrics coated with PVC are also more difficult to repair than those coated with Hypalon.

Step 1 |

Step 2 |

Step 3 |
| Click pictures for larger view | ||
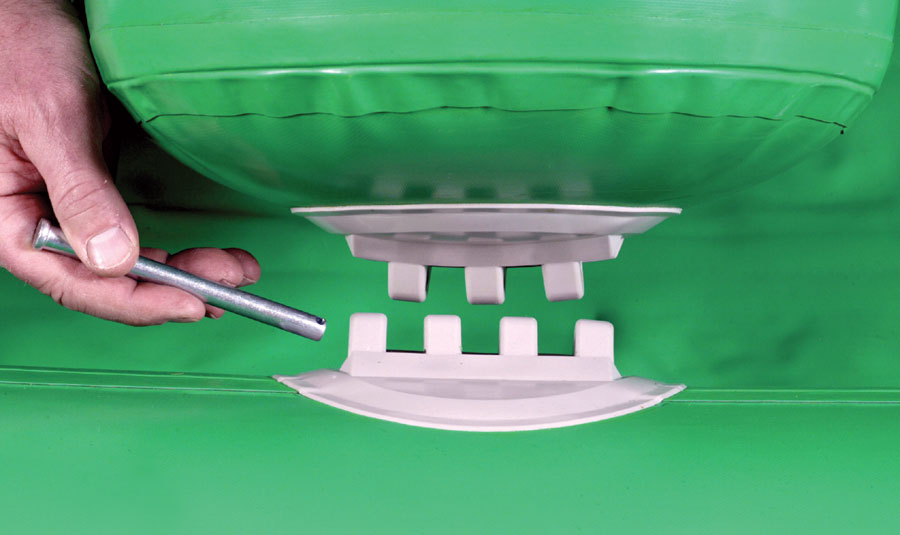
There are two categories of valve that Hyside is currently using: the Inflation Valve (Leafield C7) and the Pressure Release Valve or PRV (Leafield A6). They are very similar in how they are installed, a female part inside then a washer between the boat surface and the outside male part. It will leak if it is not tight enough (use the spanner tool to tighten it) and it will leak if the washer is installed upside own. The washer has a ribbed side and a flat side. The ribs needed to be in contact with the boat fabric.
The inside center of the valve has a spring loaded stem with a flat plunger on the bottom. When blowing air into the valve the spring will allow air to pass into the chamber. In order to let the air out you will need to push the stem down and twist it to the right. This will be in the open position to allow the boat to fully deflate. There are replacement caps available should you lose any.
The pressure release valve (PRV) is used in the inflatable floors simply because the shape will not allow the pressure that a tube will. Unlike the mattress shape of the floor, the tube is a circle that can distribute increases in pressure evenly. The valve works with a spring that opens it at a per set pressure. You will notice a screen is mounted on a rubber gasket in the center of the valve. This keeps particles from folding the inside. Should your valve fail to open at the designated pressure, remove the valve and rinse it in soapy water and rinse it thoroughly.